
Welcome to my Scalemate tutorial! The pattern design is mine, but you are free to make these squishy friends yourself. Just make sure you give credit to me and link back to Metroidhat if possible.
If this is your first time sewing or if you need a refresher, please check out the Materials and Techniques page. You should read it anyways.
Click here to skip to part 2: The Body
-2 colors of fabric. 30cm x 1m should be plenty. (Fleece or minky recommended. Felt if you're in a pinch.)
-2 matching buttons 2-2.5 cm in diameter
-thread in colors corresponding to your fabric and buttons
-stuffing
-sharp fabric scissors
-non-fabric scissors for cutting paper
-pins
-needles
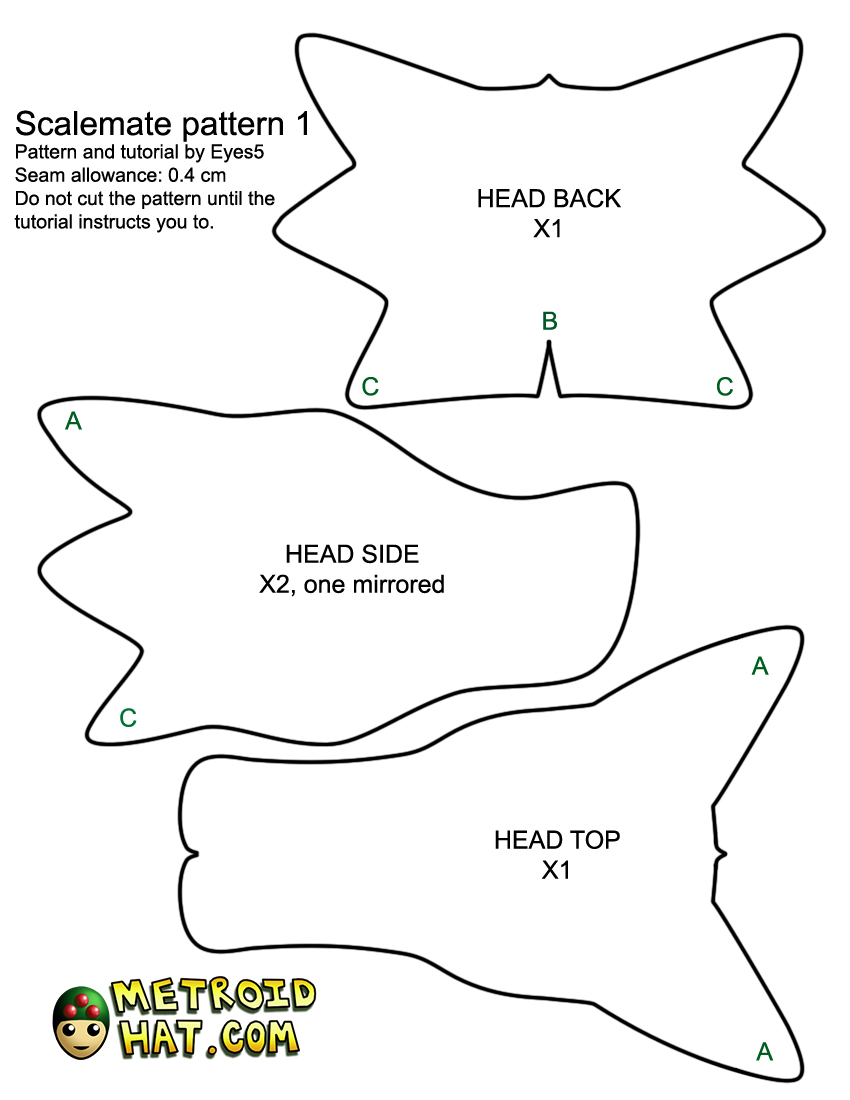
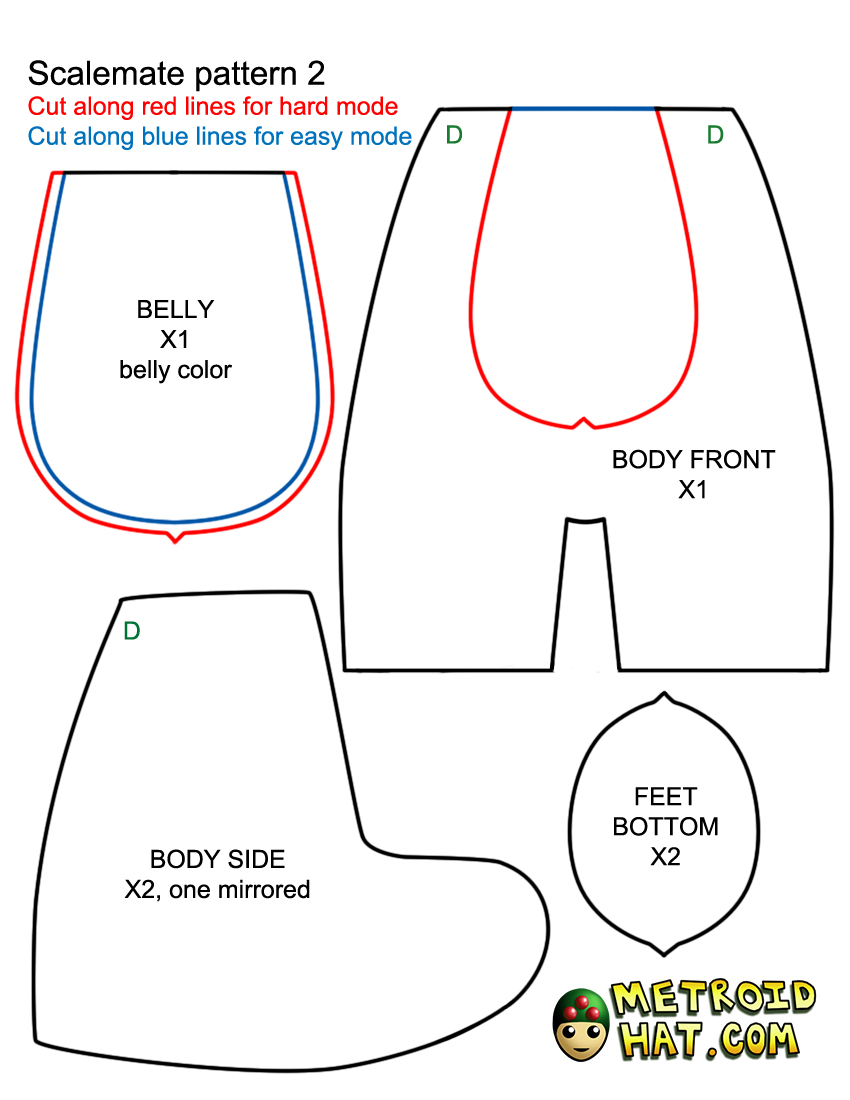
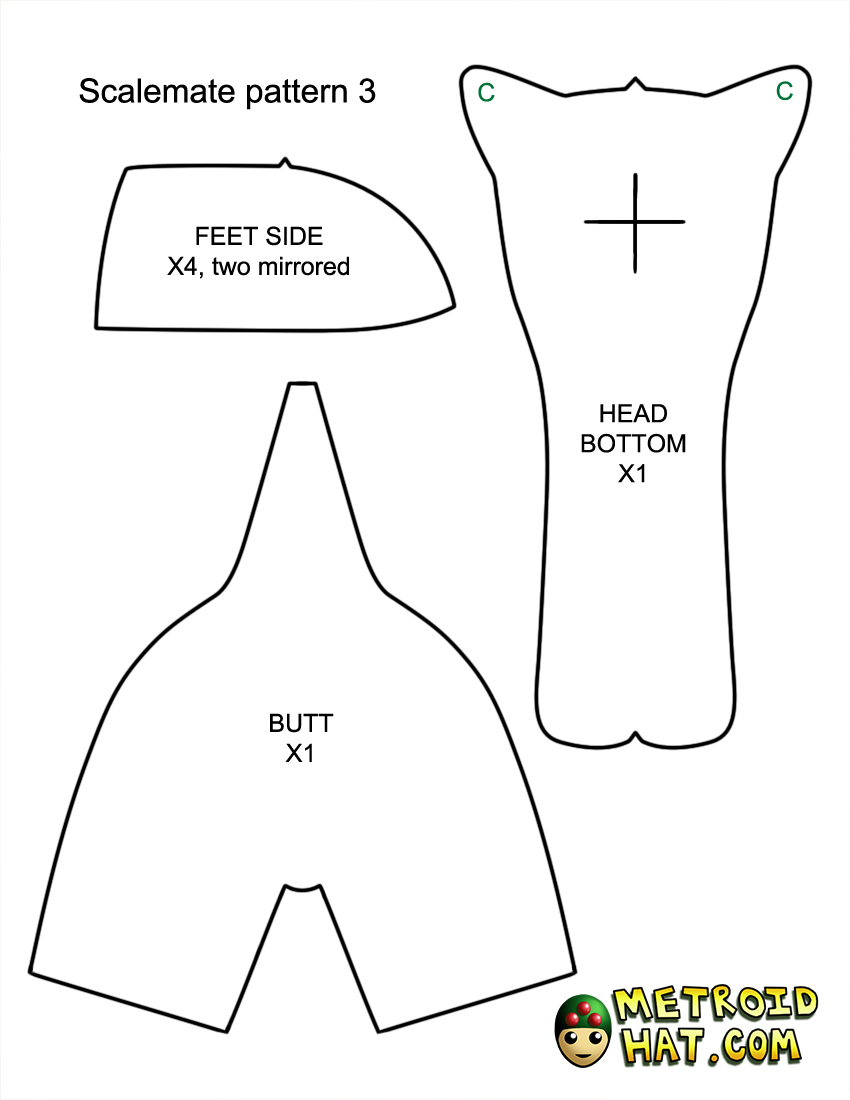
-SCALEMATE PATTERN ONE TWO THREE
First of all, READ THE WHOLE TUTORIAL BEFORE YOU DO ANYTHING. Seriously, don't buy anything, don't cut anything out, not until you give this a good read-through and know more or less what you're doing. Done? Okay good.
Fleece or minky fabric is ideal for this project. They normally come on 1.5m width bolts, and a 30cm length of fabric is more than enough of your primary body color. But I wouldn't get anything thinner than 30cm. If you want to get felt, you will need about 4 sheets of 8x11 fabric pieces.
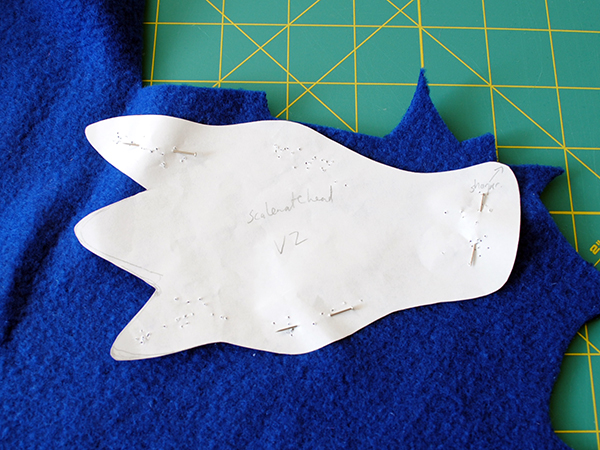
Start by printing out (or tracing) the pattern provided above such that each page fits snugly onto a normal 8x11.5 piece of paper. Cut out only the HEAD paper pieces for now, (using non-fabric scissors) along the black lines. Note that my seam allowance is .4 cm. That is, there is .4 cm of distance from where I sew to the raw edge of the fabric. If that's not enough wiggle room for you, expand the pattern by another few millimeters if necessary. Cut the HEAD pieces out of fabric by pinning the paper pieces to the wrong side of the fabric and cutting around the paper.
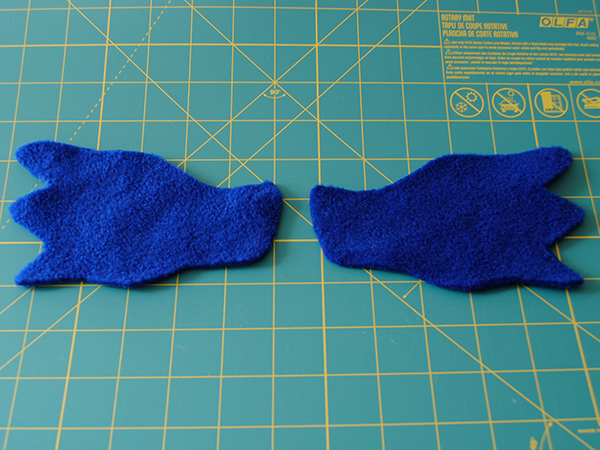
The HEAD SIDE should be cut out twice, once normally and once with the paper flipped over, in order to obtain two HEAD SIDE pieces that are mirrored images of each other.
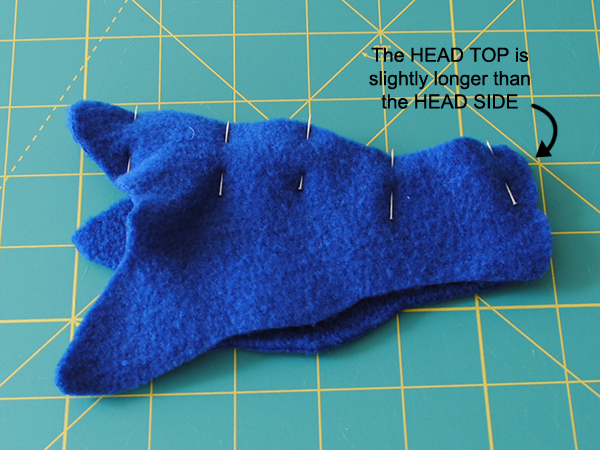
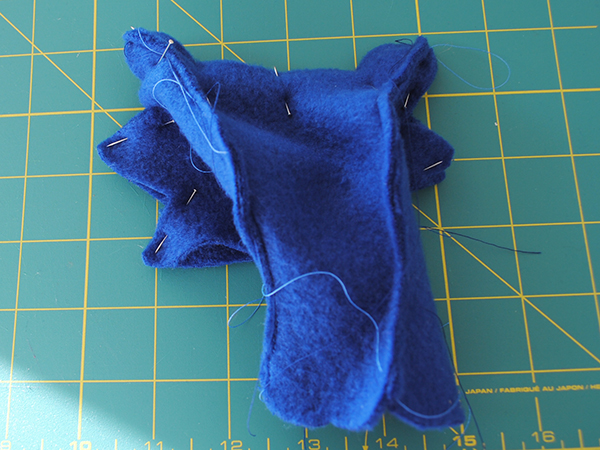
Take the HEAD TOP piece and one of the HEAD SIDE pieces. With the good sides of the fabric facing each other, pin the two pieces together, matching their head spikes (A) against each other. The snout of the two pieces shouldn't match exactly; a bit of the HEAD TOP will stick out. Oh and by the way, notice that I'm pinning my pins perpendicular to the seam. This is best for machine sewing, but if you're hand sewing, you're better off pinning right along where you intend to sew.
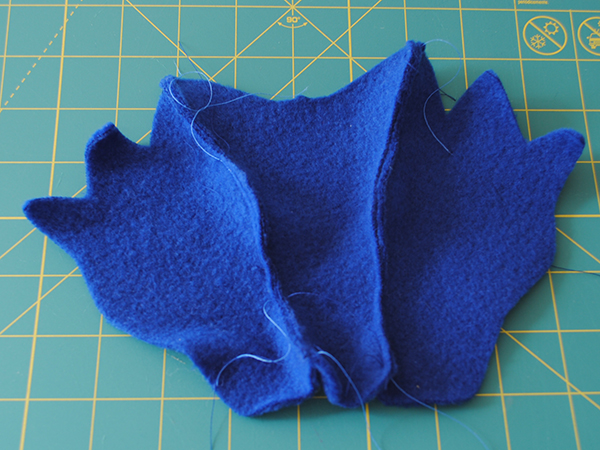
Sew a running stitch along those two pieces from the tip of the head spike to where the snout ends on the HEAD SIDE. Now do the same to the second HEAD SIDE piece, connecting it to the other side of the HEAD TOP. Here's what the three pieces look like joined together.
Take the HEAD BACK piece and fold it in half along the dart (B), good sides facing, and sew up the dart.

Match the HEAD BACK to the combination of HEAD pieces so far. The back spikes should all match up. Pin them together. Here you can see two views of what the head looks like so far.
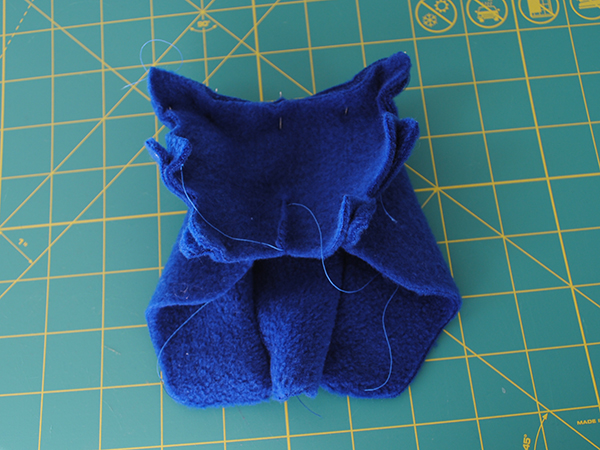
Sew starting from the tip of the lowest head spike (C), up along the spikes, along the top of the head, down the spikes until you reach (C) on the other side. You may have a bit of trouble when sewing at the top head spike (A), where the extra fabric of the seam allowance can get in your way. Flatten the seam allowance on either side of the seam and sew on top of it. Leave the bottom of the HEAD BACK unsewn for now.

Match the HEAD BOTTOM to the rest of the HEAD combination. Make sure HEAD BOTTOM is flush with the rest of the head, especially the bottom head spikes (C) and the snout of the HEAD TOP. If the HEAD BOTTOM is too long or too short causing the pieces to not match up, trim it or cut a new HEAD BOTTOM that is a little longer at the snout. Here's two views of the pinning job.
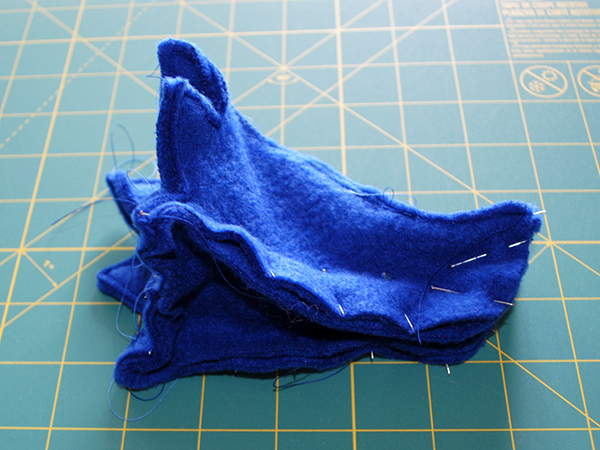
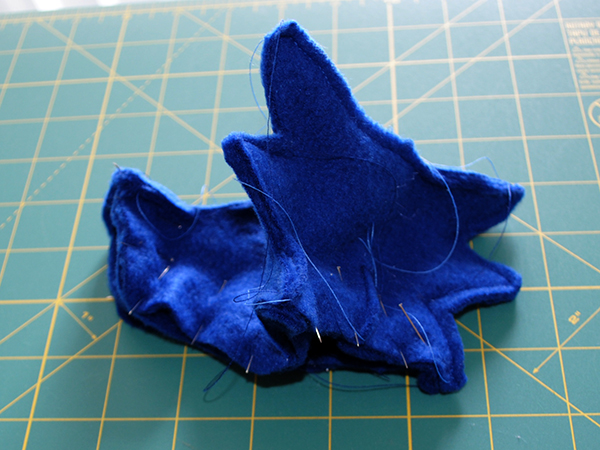
Sew around the entire outer edge of the HEAD BOTTOM. The result should be an inside-out Scalemate head that is completely enclosed.

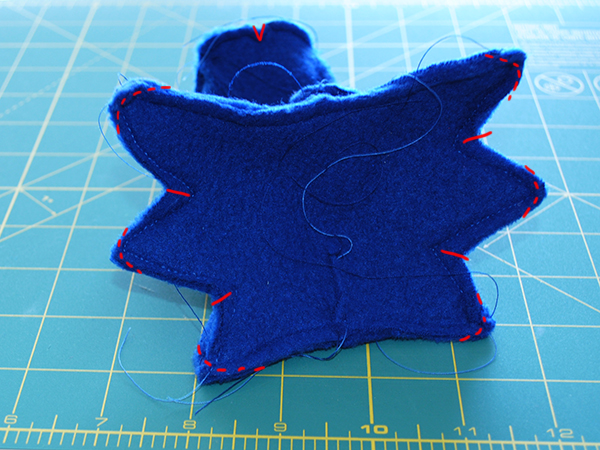
Take a moment to examine the head so far. It should look like an inside-out Scalemate head. All visible sides should be the wrong side of the fabric and all raw edges should be sewn up.
Now it's time to trim away bits of the seam allowance before you turn the head inside out. Snip the fabric at every acutely angled seam crotch, such as between the nostrils and between all the head spikes. Also trim away the seam allowance at any protruding spots, such as the tips of the head spikes and nostrils. The red marks indicate where you should cut. Be careful not to cut any thread! The reason this is done is to remove bulk from pointy bits like the head spikes and to reduce tension in the fabric once it's turned inside out.
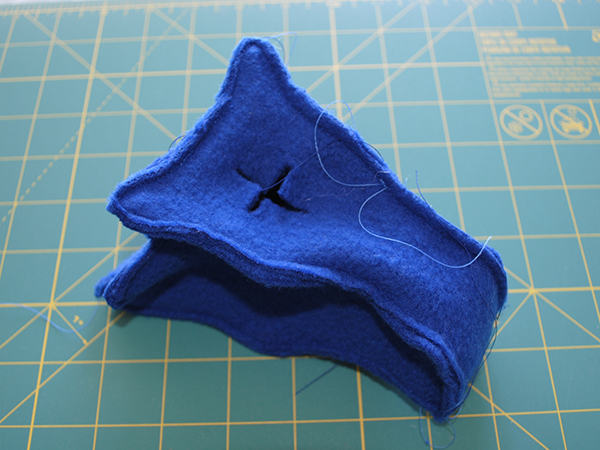
At the bottom of the head, where the neck will eventually attach, cut two small slits, forming a cross. Use this hole to turn the head inside out.
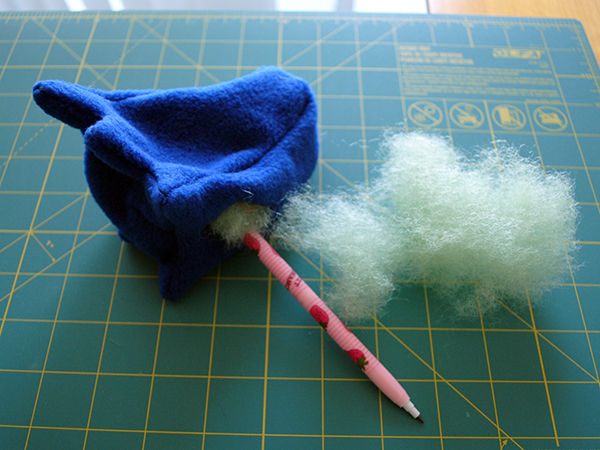
Make sure you get the nostrils and head spikes fully turned out; use a poking stick like a chopstick if you need to. Check it out! It's your floppy brainless Scalemate head.

Stuff the head carefully, a little bit of stuffing at a time, working it into the extremes of the nostrils and head spikes first. Give the head gentle squeezes once in a while to evenly distribute your stuffing. Stuff it to your desired squishiness, but don't go overboard if you're using a fabric that stretches.
:3
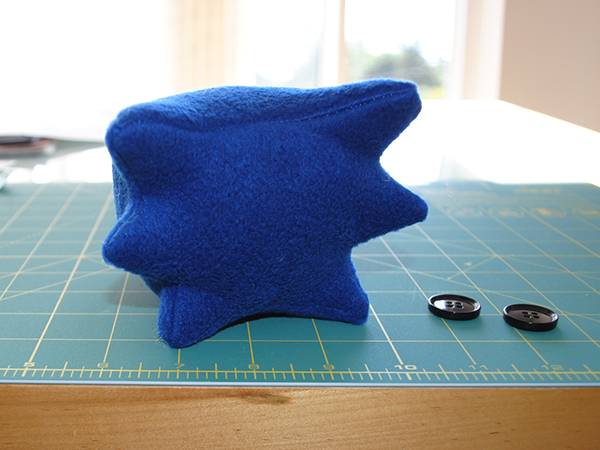
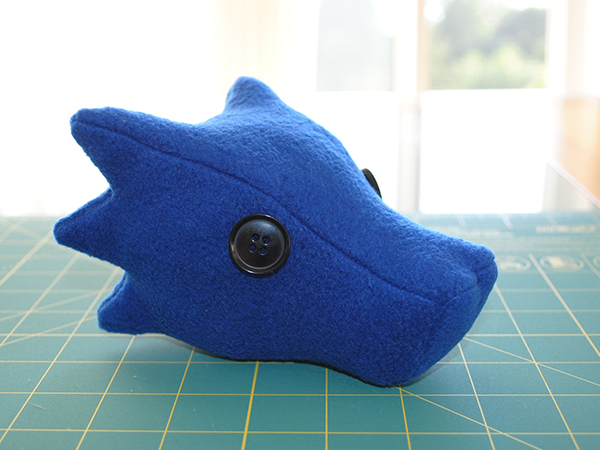
Take your two eye buttons and place them on the head, shifting them around to see what look you like best. You'll want to mark where the button sits on the fabric. You can do this with a variety of non-permanent fabric markers, but a few pins could just as easily mark the position.
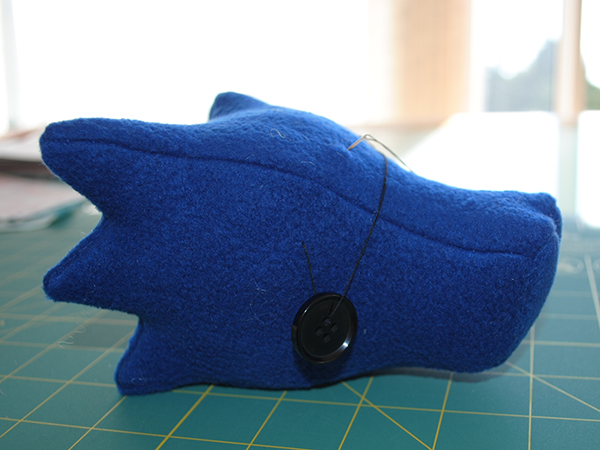
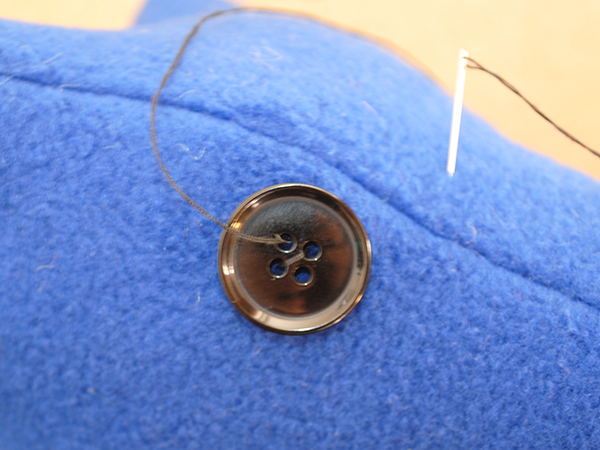
With a knotted thread that's the same color as the button, sew through about the center of where the button should be, piercing the fabric from the inside so the knot is hidden. Poke your needle through a hole in your button from behind, then downwards through another hole. Poke your needle through the Scalemate fabric near where the first puncture is, but not all the way, because you should poke through the nearby fabric again. Pull tight, and repeat, keeping your stitches near the center of where you want the eye to be.
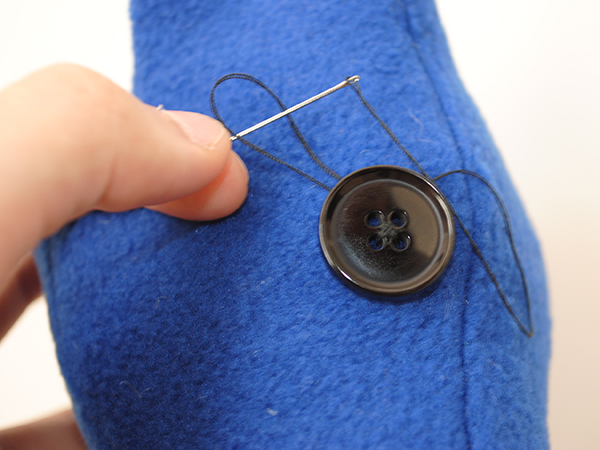
To finish off the button once you feel it's secure enough, poke your needle through the Scalemate's head near the rest of the threading, underneath the button. But don't don't pull the thread taut; the point is to create a loop of thread to use for tying off. Tie a knot like it's explained in the Materials and Techniques page and hide the remaining thread in the fabric or just snip it off where it's hidden under the button.
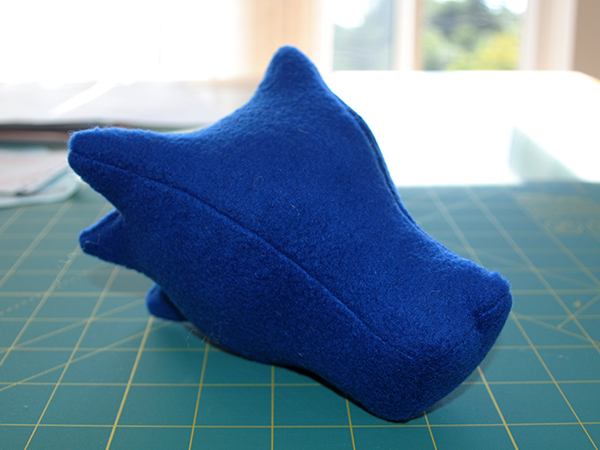
Check it out! Your finished Scalemate head!
